
Module 5 - Connecting Shopify to Facebook and Instagram; Domains; Posting to Facebook and Instagram

We have a lot to cover in this module!
Shopify store structure and customization
Domains
Setting up a Staff Account and Hiring A Pro
Setting up a Facebook Business Page
Setting up a Facebook Shop inside Shopify
Connecting Shopify to Facebook and Instagram
Posting Products to Facebook and Instagram
Update to the Class Structure
From this point forward you will no longer see a link to download the Workbook. You will instead see a link to download the Slide Deck. This is the slide deck that I use in the weekly live class. From this point forward, the classes are heavily video-based, primarily because there is so much information to cover. Because of that, I am not repeating the video segments in the workbook. The slide deck will serve as your guide for the lessons.
Store Structure and Customization
This is the place to tweak the look and function of your store.
First, go into your Shopify dashboard, and on the left-hand side, click on “Online Store.” Under that take, a look at “Themes.” If you look to the right-hand side, you will see that you can use Free Themes or go into the Shopify Theme Store and purchase a theme. When you’re just starting out, it may be beneficial to use a free theme to get the feel of the store structure. You can always change the theme later.

Now click on “Customize” to go into the store’s theme dashboard and start customizing it. Once inside, you will see the left-hand menu which allows you to move things around, add and delete collections and sections and so on.
Remember, your store is not live just yet so you can play with the store structure as much as you like and no one will see it. Everything you do on the left-hand side will be reflected on the right-hand side.
If you like what you have, be sure to click “Save.”

Be sure to watch the entire video “Shopify Store Structure” below for a thorough overview of the store structure and customization.
One more thing to note. If you have customized your store and like it just the way it is, but think maybe you’d like to make a change or two - make a duplicate of your store as it is before you make changes. In this way, you can always revert to your original copy if you don’t like the changes you’ve made.
Just drop down the “Actions” menu and click on “Duplicate.” It will make a copy of your store at the present time. Then you can freely make changes knowing that your original store properties are copied.
This is also the location where you can edit the code of your site. I don’t recommend you edit the code of your site unless you are well versed in the Liquid coding language. You can always hire an outside expert for this. See the Resources page for my preferred Shopify experts.

Shopify Store Structure and Customization
Domains
Your store domain is an important piece of your business. This is the address on the Internet where your customers will find you. Carefully consider your domain name when you set up your store. Make it easy to remember and descriptive.
For instance, my Shopify-managed domain (the domain you set up when you first open a trial store) is acrylic-diva.myshopify.com. My custom domain is shop-acrylicdiva.com. Easier to remember and on brand with my main website at acrylicdiva.com.
Take a look at this resource inside Shopify support for a clear explanation of domain terminology.
You can, and should, have a custom domain name for your store. It gives your customers a level of trust and gives you a level of credibility.
Setting up your domain isn’t rocket science but it isn’t a snap either. I recommend hiring a professional to set up your domain unless you are well versed in the ins and outs of DNS, CNames and A records. If any of that sounds like gibberish, do yourself a favor, hire a pro.
One of the beauties of using a platform like Shopify is that they make it easy for you to bring in outside help.
In the Settings video I briefly touched on Staff Accounts. Here is another look at hiring a pro to help you, and creating a Staff Account for your pro.
Setup a Staff Account and Hire A Pro
Create A Facebook Business Page
In order to post your products on Facebook or Instagram you must first have a business Facebook page and a business Instagram account. See the video below on how to set up your Facebook Business Page.
Create a Facebook Business Page
Change Your Personal Instagram Account to a Business Account
Go inside your personal Instagram account and follow these steps to change it over to a Business account.

Inside your personal Instagram account, tap on the ‘hamburger icon’ in the upper right. Then tap on “Settings.”

Scroll down and tap on “Account” then scroll down and tap on “Switch to Business Account.”
Connect Shopify with Facebook and Instagram
Once your store is populated with products, and you have created collections, you’re ready to set up your Facebook Shop and start posting products for sale inside Facebook and Instagram. Take a look at the following video for a complete guide to connecting your Shopify catalog to Facebook and Instagram.
Connecting Shopify Catalog to Facebook and Instagram

If you get an error message when trying to access Catalog
Follow the steps below and you should be able to access Catalog from your Business Page.

If you have tried to reach Catalog from business.facebook.com and you get this error message, you can access Catalog another way as long as you are signed in to your Personal and Business Page.
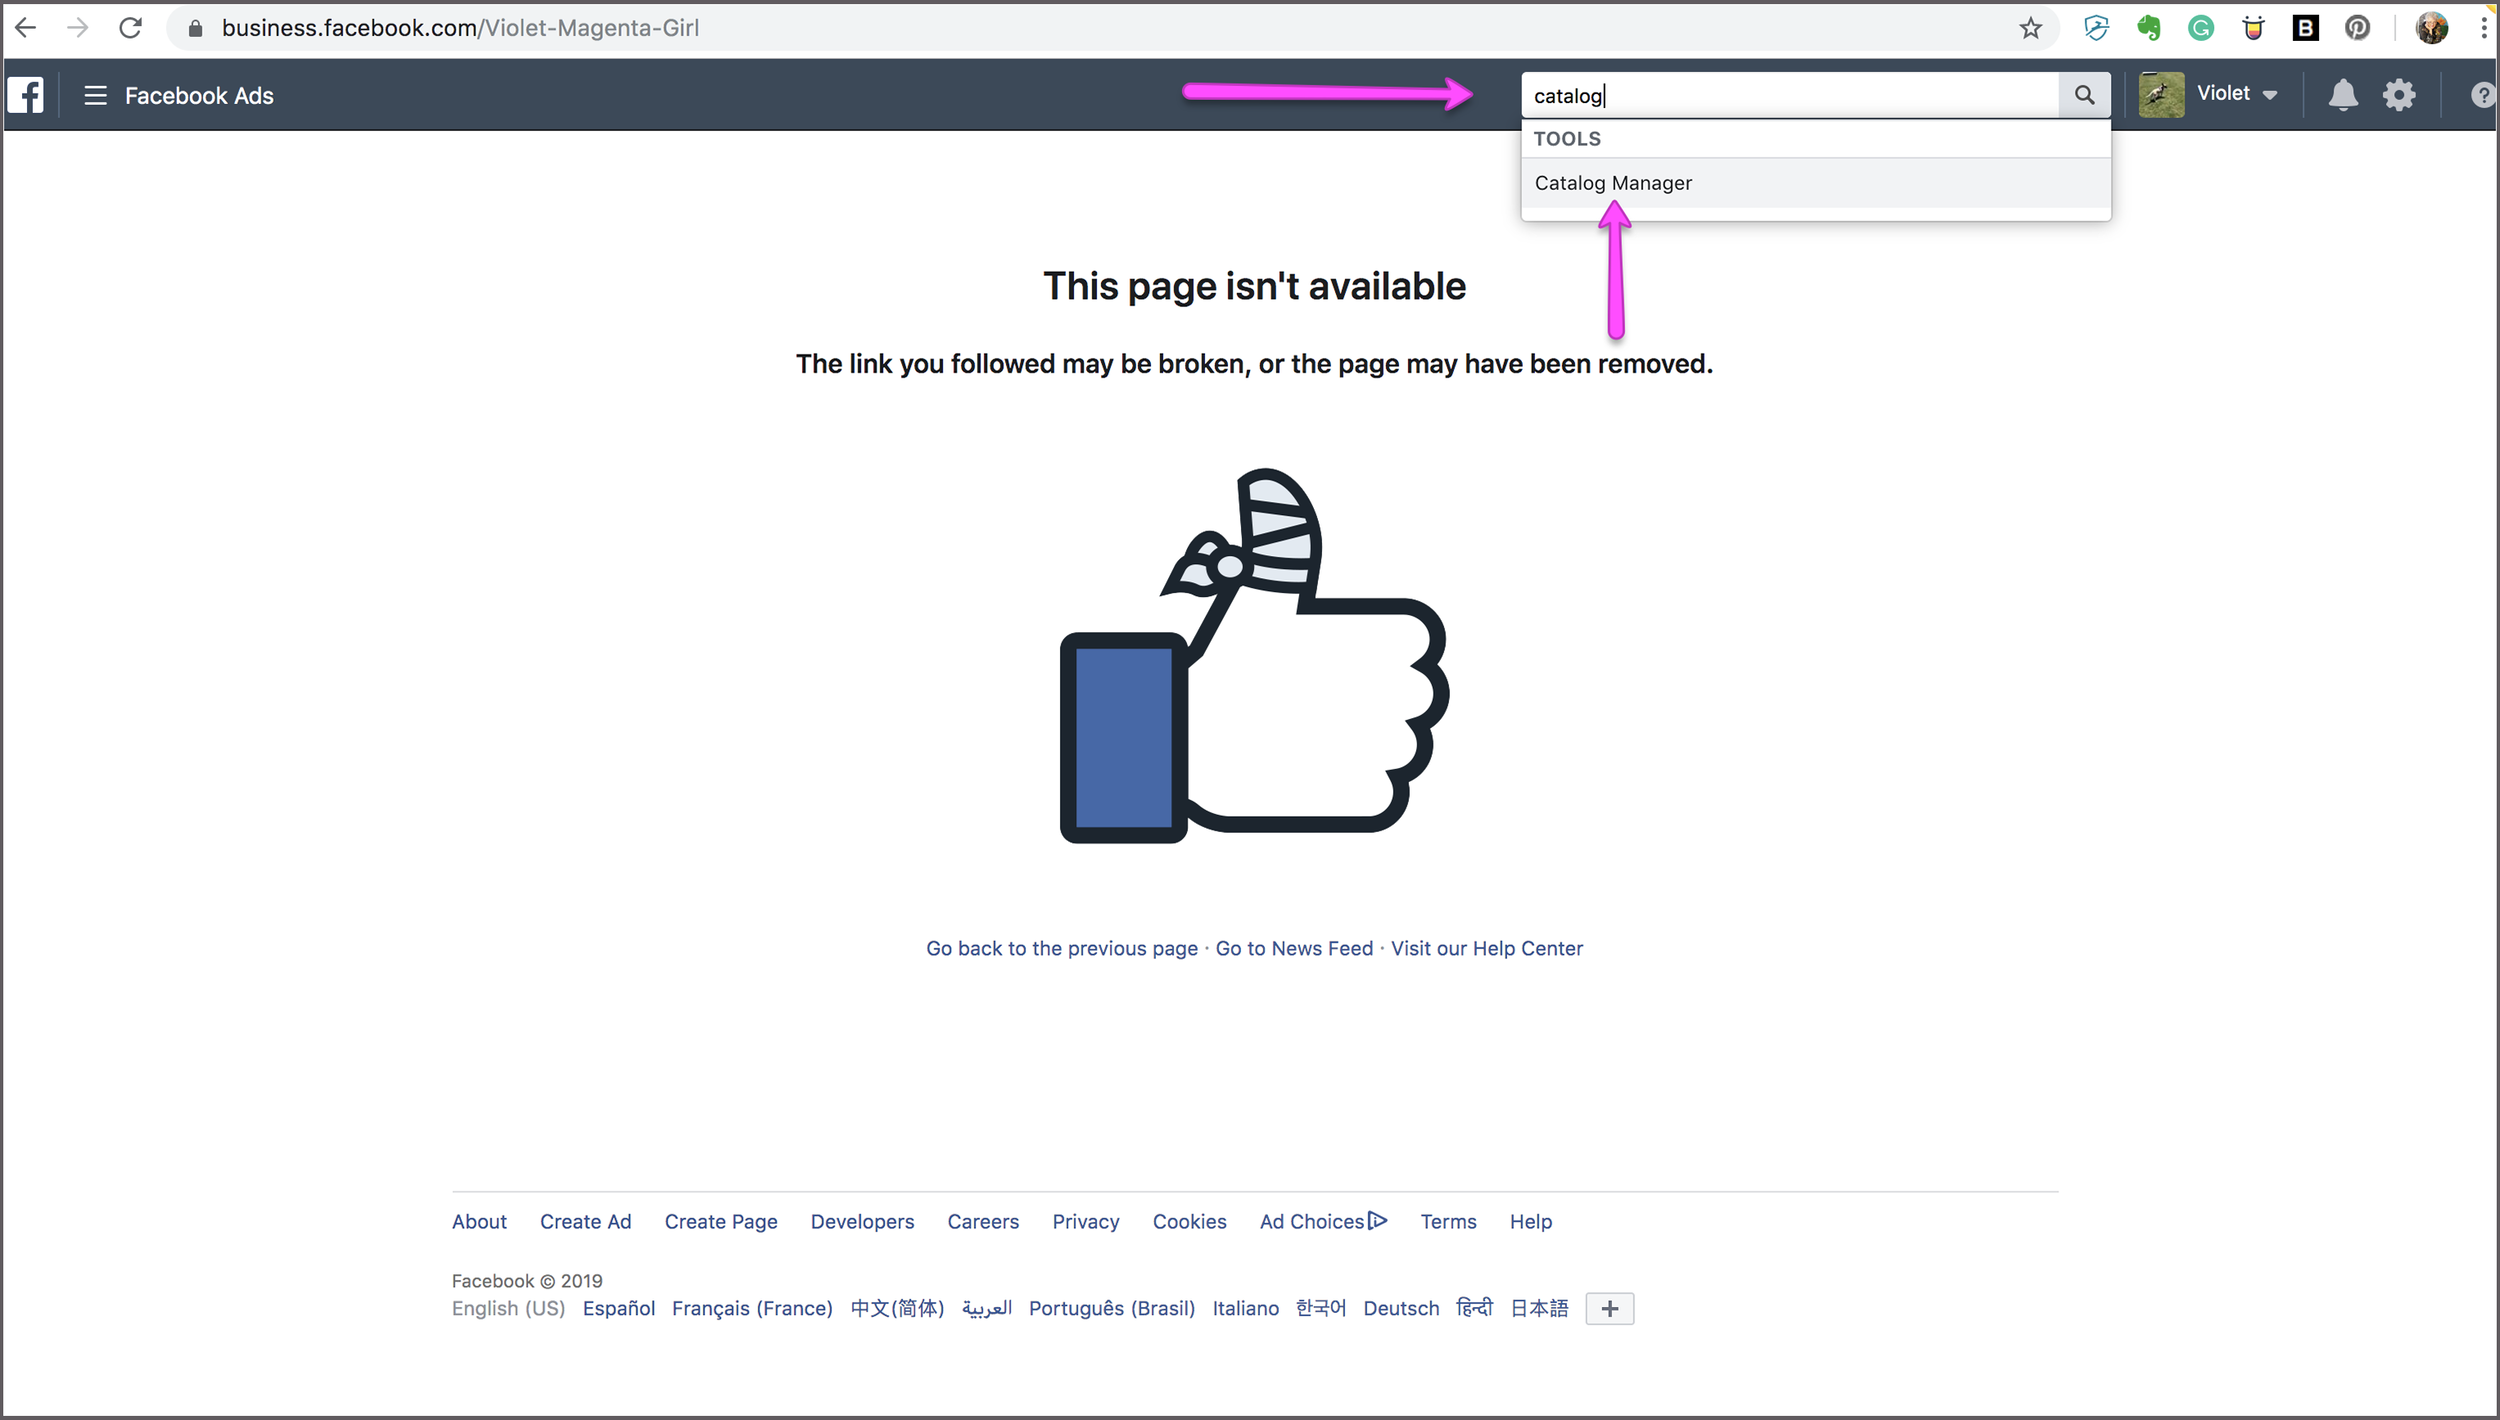
From this error page, type “catalog” in the search bar. A menu will drop down with Tools. Choose “Catalog Manager.”

You should then see this page with your Catalog from Shopify.

Posting to Facebook and Instagram - Tagging Products
You’ve done all this hard work with your catalog and connecting Facebook and Instagram. Now get ready to post your products for sale!
Posting to Facebook and Instagram - Tagging Products
Your homework this week:
Customize your store with at least one change to the theme you are using.
Set up your Facebook Business Page
Setup your Instagram Business Account
Connect your Shopify Catalog to Facebook
Investigate hiring a pro for your domain.