
Module 4 - Store Settings, Orders, Customers and Discounts
You’ve done all this hard work setting up your store, making a product and customizing the look and feel of your store. Would you like to get paid when your customers buy something?
Let’s dig into Settings in the Shopify dashboard. We will set up all of the necessary settings.
In this module we will cover Shopify Settings including:
Payment Providers
Checkout
Shipping
Taxes
Notifications
Files
Plans and Permissions
Legal
From the left-hand menu inside your Shopify dashboard we will also cover:
Orders
Customers
Discounts
To begin in “Settings” log into your Shopify dashboard and scroll all the way to the bottom on the left.
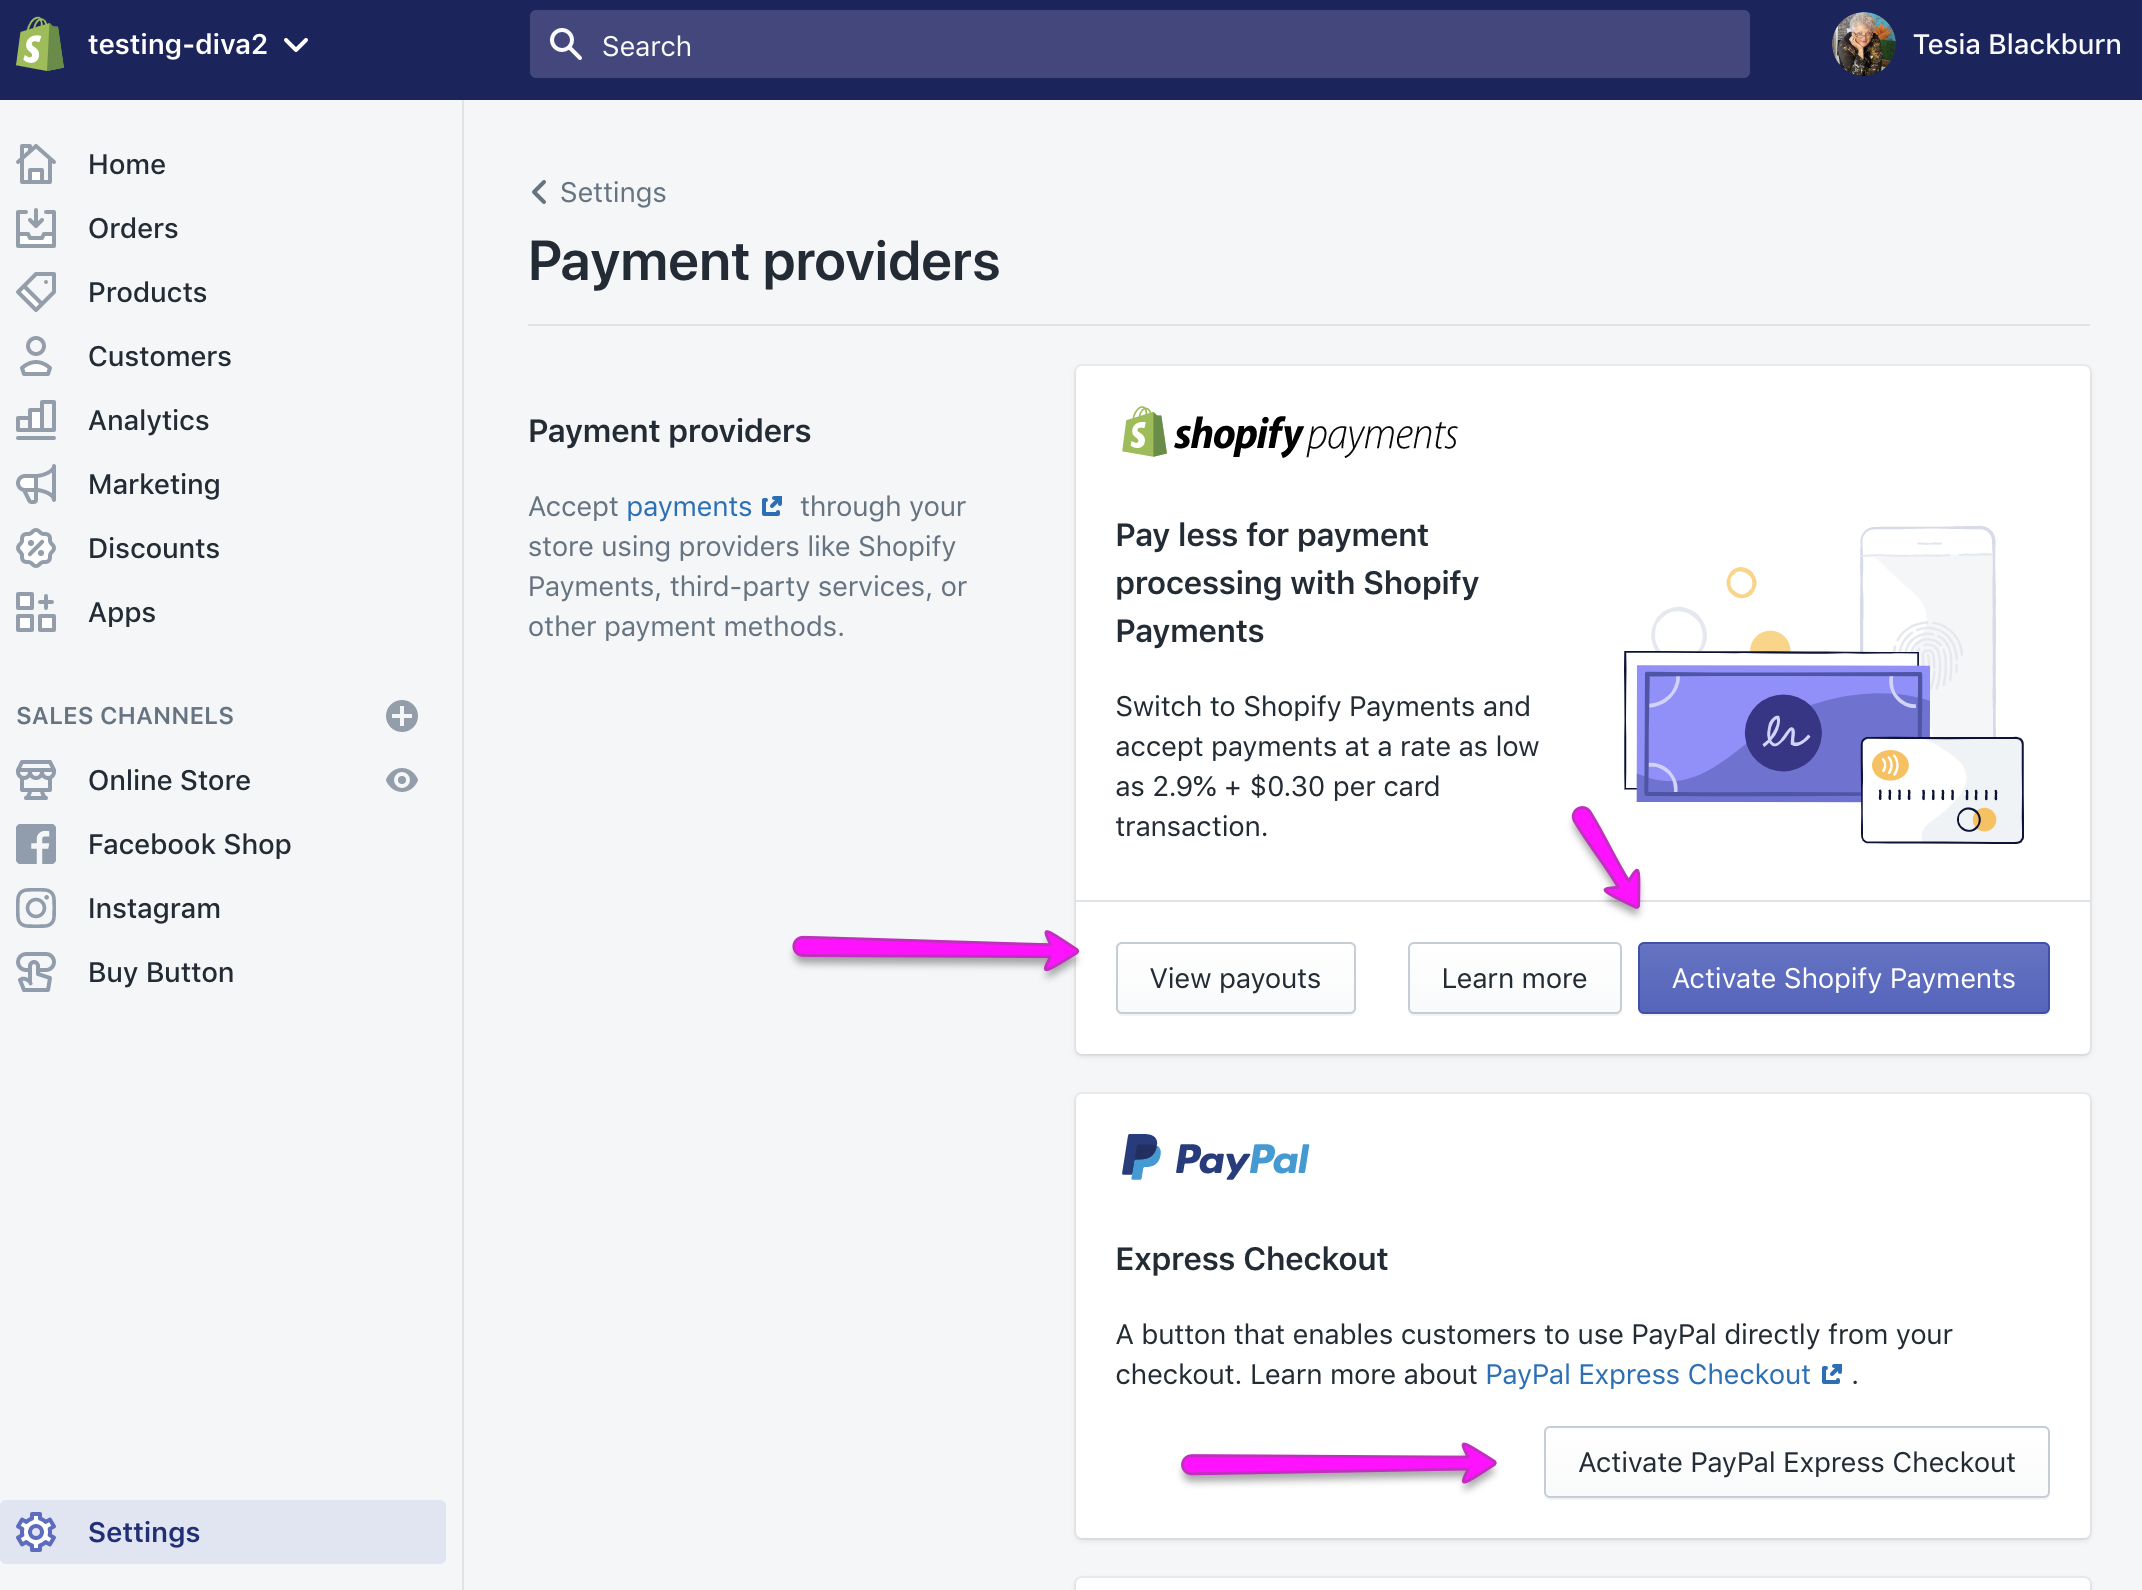
Set Up Payment Providers

Tap on Payment Providers

Activate Shopify Payments.
If you have a Paypal account (highly recommended) you can activate it as well. Shopify payments is the only Payment Provider you need. You can activate others if you like.
Optional
Scroll down and activate Amazon pay (if you have an Amazon seller account) and any other payment providers you wish to use.

Be sure to scroll all the way to the bottom and select “Automatically capture payment for orders.” This will ensure that your customers’ payments are automatically captured and sent to Shopify.

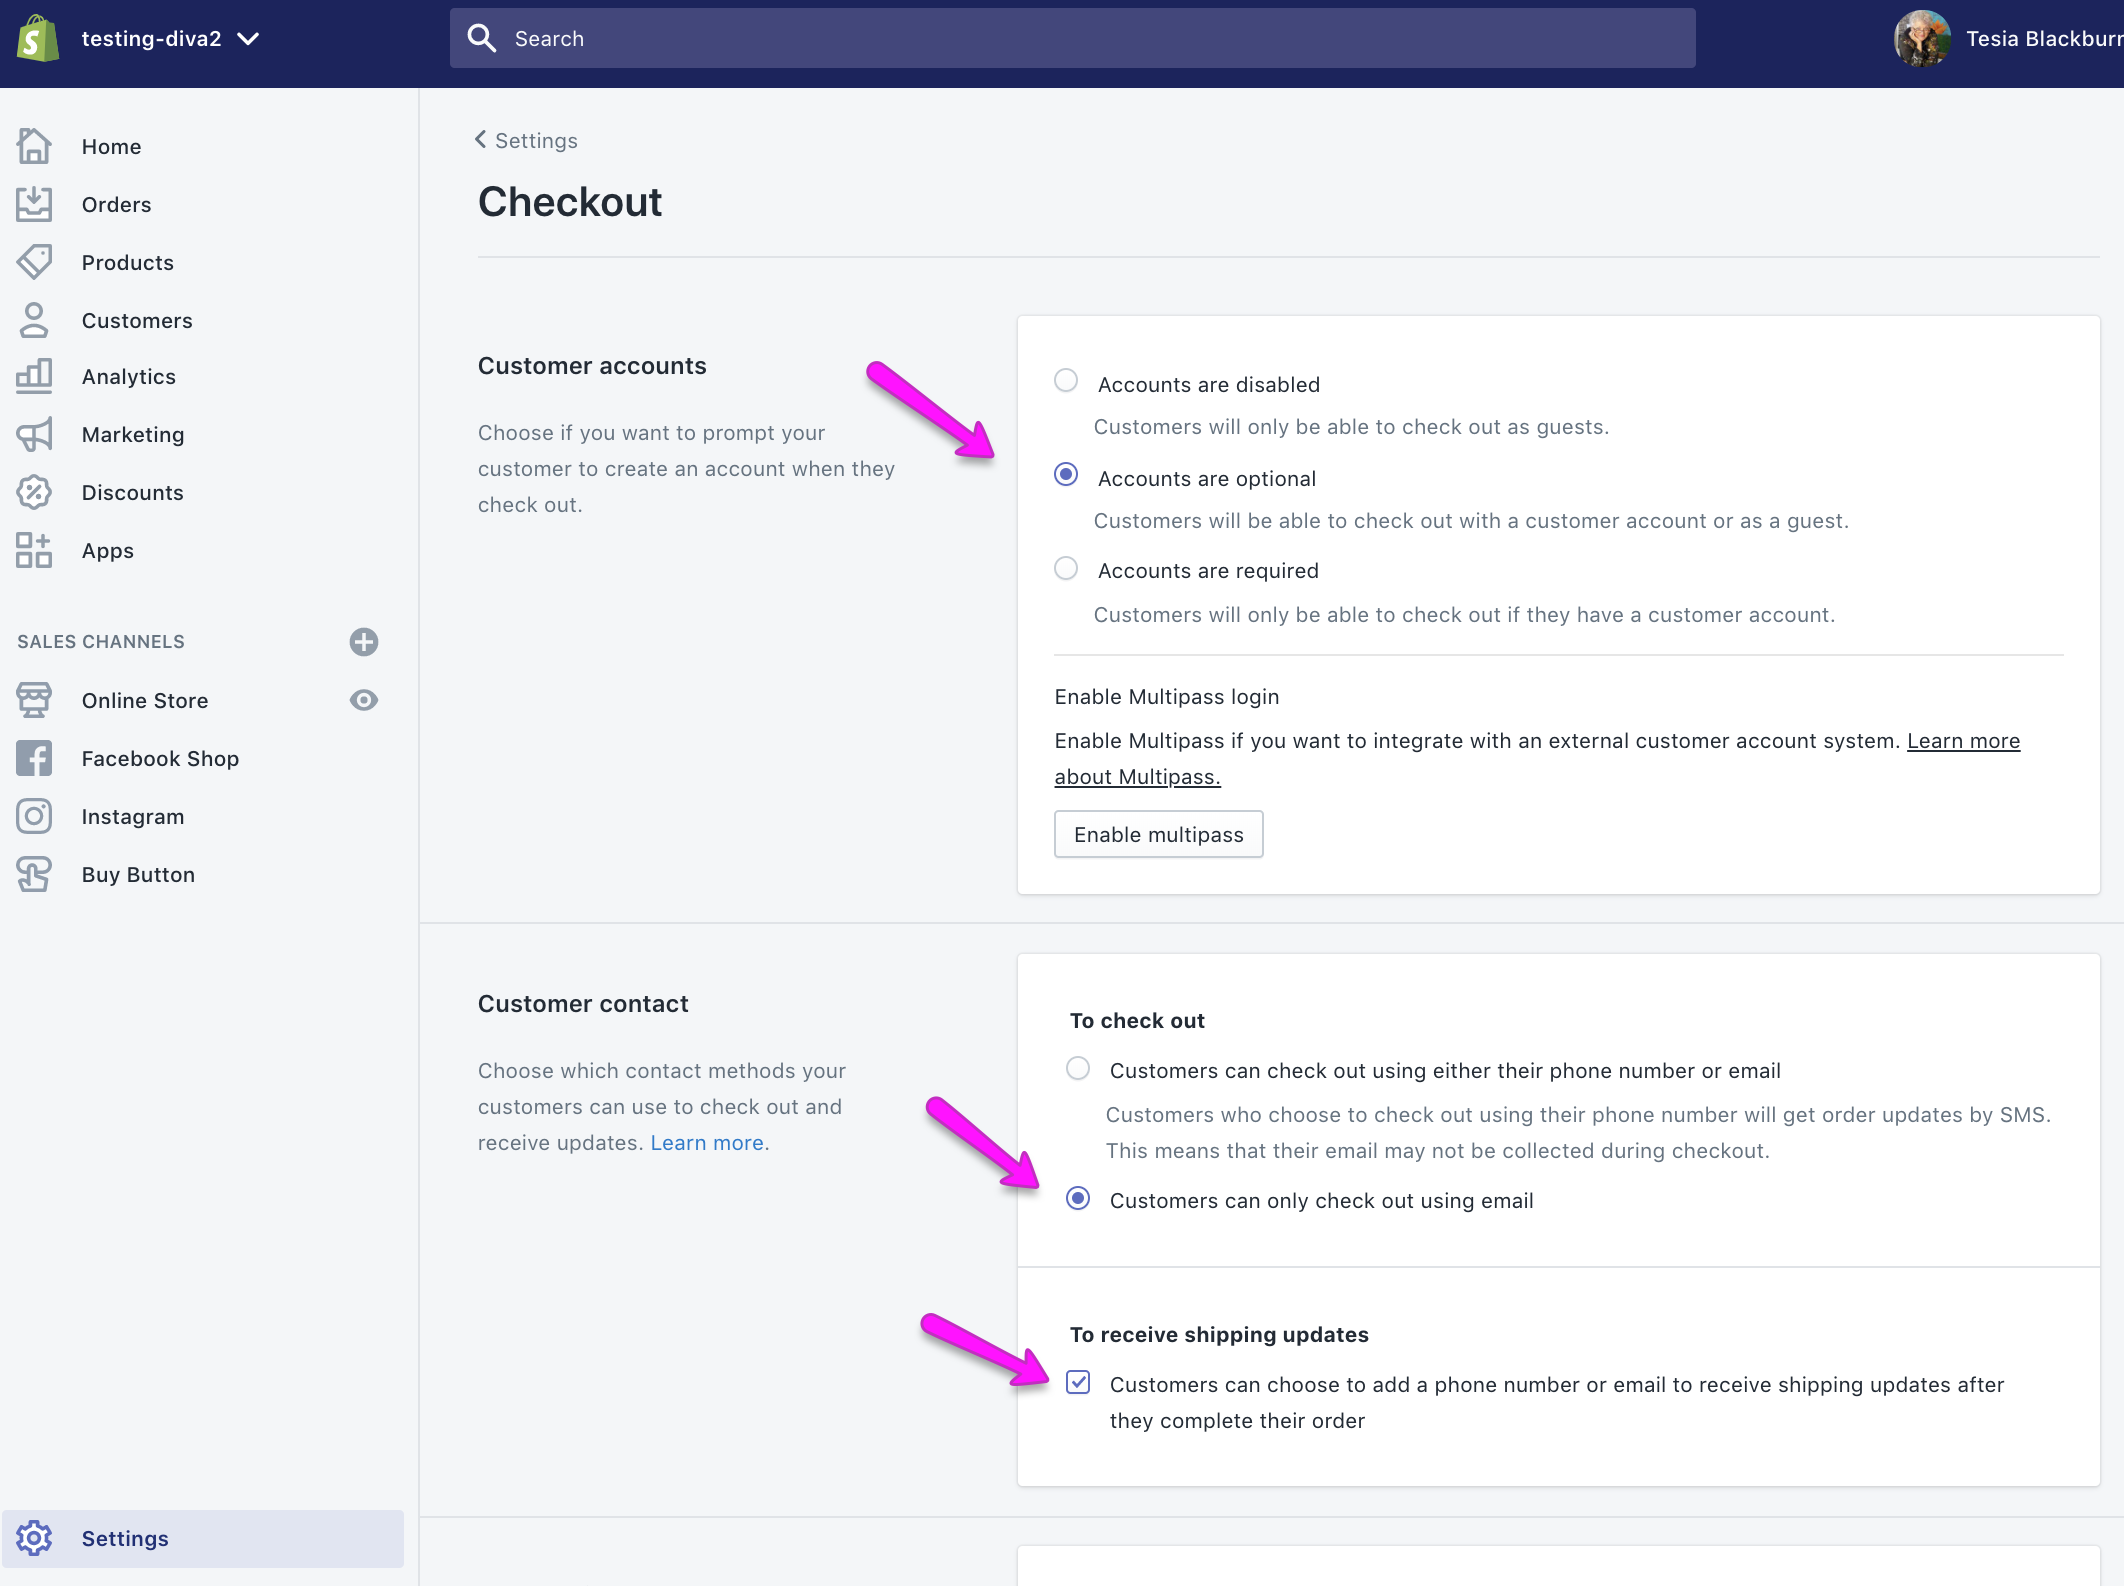
Next, go back to Settings and open “Checkout.” Shown below are my preferred settings. You may change any of these if you like. However, remember to make it easy for your customer.
More of my preferred settings under “Form Options.”

Continuing down the page with my preferred settings. These are pretty self explanatory.

And finally, email marketing option (a good idea) and abandoned checkout emails. Both of these are truly good ideas!

Let’s head back to settings and go through them in detail.
In this video I cover making a test order to see what your customer sees in regards to notifications, etc. If you make this kind of test order you must cancel it immediately so that your vendor doesn’t fulfill it.
Another way to create a test order is to make a bogus test order. See this help page to create a bogus test order.
LEGAL SETTINGS
You are welcome to use these documents to help you create your own policies and statements. It is always a good idea to seek legal advice where needed. Proof your documents carefully. My website, names and so on are used several times throughout these documents.
DISCLAIMER: I make no guarantees about the accuracy or legality of any of these forms.
Check the Resources page for links to legal information.
Once you’ve finished going through “Settings” head back over to the left hand menu. Let’s go through Orders, Customers and Discounts in detail. Go to this page for more information on creating test orders in Shopify.
Orders, Customers and Discounts
Your homework this week:
Complete the “Settings” section inside your Shopify Store.
Complete all four sections under “Legal.”
Setup your payment provider.
Setup one discount code.
Order a sample product from your vendor.
Make a bogus test order to verify nofitications, etc.
Download the Legal items